加入阅读目录的起源
你有没有曾经遇到这样一个场景:为了解决一个问题,搜索并打开了很多页面:
1.有些页面文章没有结构,看着混乱理解不了了。
2.有些页面文章结构清晰,但是特别特别长,看到中间就已经忘记前面的内容了,还得手动来回拉滚动条看前后的内容。
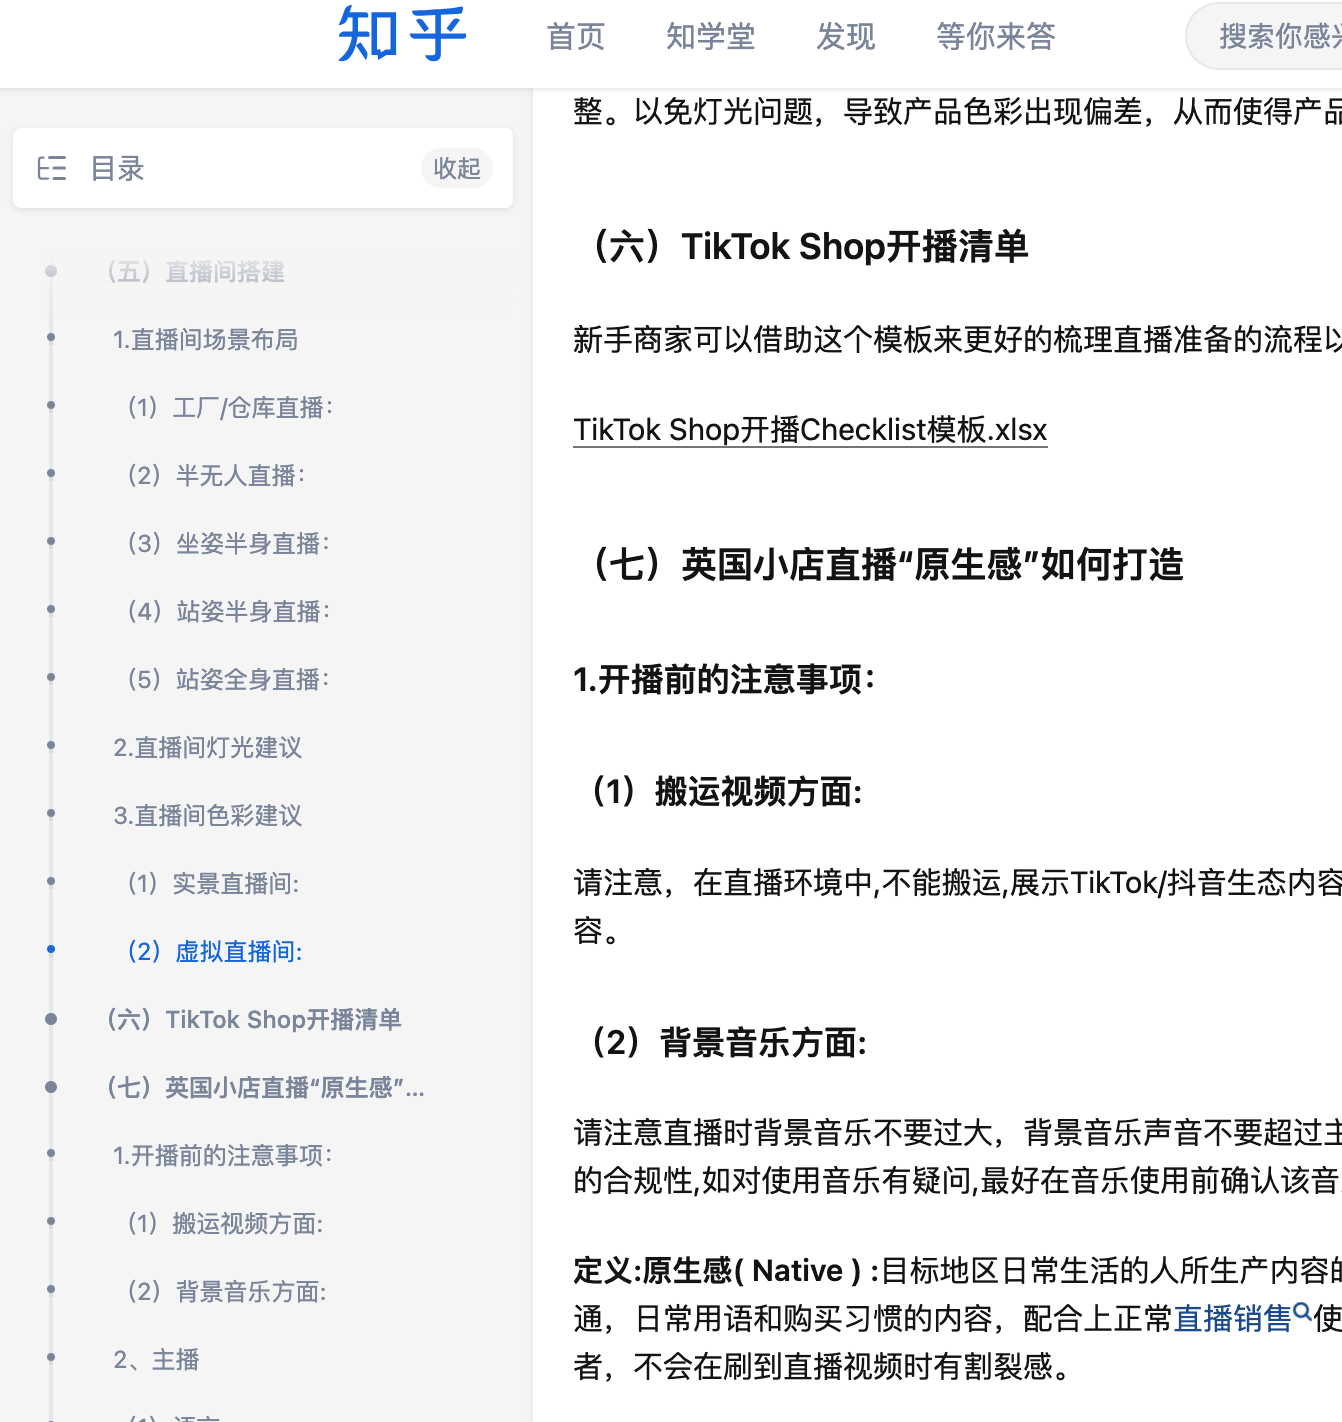
我最近就遇到了这个问题。不过在知乎的某个问题的评论区,我找到了一个可以随用户的阅读进度而更新的阅读目录,阅读体验瞬间大幅上升。
参考效果如下:
看到这个阅读目录时我大为惊叹,目录清晰,随时可以跳转到相应的内容,而且阅读到的位置会同步显示在目录上。如果在我的网站上能实现这样一种功能该有多好。
最终效果
于是,在chatgpt的协助下,我开启了阅读目录的移植探索模式。最终效果如下:

typecho常见文章阅读目录
| 名称 | 类型 | 功能 | 备注 |
|---|---|---|---|
TableOfContents | 插件 | 在文章内右上方生成目录 | 无锚点跟随效果 |
MenuTree | 插件 | 在文章页右侧生成悬浮可折叠目录 | 无锚点跟随效果 |
AutocJS | 代码嵌入 | 在文章页右侧栏内生成目录 | 依赖Joe 主题无法直接使用 |
仅按功能来说,AutoJS能完全满足我的要求,即
1.按markdown toc直接生成目录及锚点。
2.点击目录可以跳转到相应的内容(锚点)。
3.阅读滚动到相应位置会在目录列表上高亮显示。
但这个方法有一个问题,它与Joe主题高度依赖,
但我本人喜欢更简洁的Jasmine主题,所以无法直接用,
得进行一些改造。
步骤与代码
【重要】:如果安装有EditorMD插件的,一定要先把接管前台Markdown解析选否。
因为EditorMD会与阅读目录类的插件冲突导致无法生成目录。把前台解析关闭后可解决这个冲突。
1.functions.php加代码
usr/themes/xxx/functions.php其中xxx为你的模板名称,
如:default,joe,jasmine
此段代码实现添加文章标题锚点 和 显示文章目录 功能。
// 添加文章标题锚点
function createAnchor($obj) {
  global $catalog;
  global $catalog_count;
  $catalog = array();
  $catalog_count = 0;
  $obj = preg_replace_callback('/<h([1-4])(.*?)>(.*?)<\/h\1>/i', function($obj) {
    global $catalog;
    global $catalog_count;
    $catalog_count ++;
    $catalog[] = array('text' => trim(strip_tags($obj[3])), 'depth' => $obj[1], 'count' => $catalog_count);
    return '<div class="item"'.' id="item'.$catalog_count.'">'.'<h'.$obj[1].$obj[2].' id="cl-'.$catalog_count.'">'.$obj[3].'</h'.$obj[1].'></div>';
  }, $obj);
  return $obj;
}

// 显示文章目录
function getCatalog() {
  global $catalog;
  $str = '';
  if ($catalog) {
    $str = '<div id="menu"><div class="list">'."\n";
    $prev_depth = '';
    $to_depth = 0;
    $active_item_generated = false; // 是否已生成带有 "active" 类的项
    foreach($catalog as $catalog_item) {
      $catalog_depth = $catalog_item['depth'];
      if ($prev_depth) {
        if ($catalog_depth == $prev_depth) {
          $str .= '</div>'."\n";
        } elseif ($catalog_depth > $prev_depth) {
          $to_depth++;
          $str .= '<div class="list sub-list">'."\n";
        } else {
          $to_depth3 = ($to_depth > ($prev_depth - $catalog_depth)) ? ($prev_depth - $catalog_depth) : $to_depth;
          if ($to_depth3) {
            for ($i=0; $i<$to_depth3; $i++) {
              $str .= '</div>'."\n".'</div>'."\n";
              $to_depth--;
            }
          }
          $str .= '</div>';
        }
      }

      // 检查是否是带有 "active" 类的项
      $active_class = ($active_item_generated) ? '' : 'active';

      $str .= '<div class="item"><a class="link ' . $active_class . '" href="#cl-'.$catalog_item['count'].'" rel="external nofollow"  title="'.$catalog_item['text'].'">'.$catalog_item['text'].'</a>';

      // 标记已生成带有 "active" 类的项
      if (!$active_item_generated) {
        $active_item_generated = true;
      }

      $prev_depth = $catalog_item['depth'];
    }
    for ($i=0; $i<=$to_depth; $i++) {
      $str .= '</div>'."\n".'</div></div>'."\n";
    }
    $str = '<div class="title" style="padding-left:20px;">文章目录</div>'."\n".$str.' '."\n";
  }
  echo $str;
}
2.header.php加代码
usr/themes/xxx/header.php其中xxx为你的模板名称,
如:default,joe,jasmine
此段代码引入css文件 和 实现滚动时锚点跟随
需要注意的是,如果你已经引用过jquery了,可以把以下代码中的jquery引用那一段删除,以避免冲突。
<link type="text/css" rel="stylesheet" href="<?php $this->options->themeUrl(
      "assets/css/joe.post.min.css"); ?>"/>
<script src="https://code.jquery.com/jquery-1.11.1.min.js"></script>
<script type="text/javascript">
$(document).ready(function(){

    //滚动时影响右侧文章目录active类
    $(window).scroll(function(){
        var top = $(document).scrollTop();          //定义变量,获取滚动条的高度
        var menu = $("#menu");                //定义变量,抓取#menu
        var items = $("#content").find("h1,h2,h3,h4");    //定义变量,查找.item

        var curId = "";                             //定义变量,当前所在的楼层item #id

        items.each(function(){
            var m = $(this);                        //定义变量,获取当前类
            var itemsTop = m.offset().top;        //定义变量,获取当前类的top偏移量
            if(top > itemsTop-50){
                curId = "#" + m.attr("id");
            }else{
                return false;
            }
        });

        //给相应的楼层设置cur,取消其他楼层的cur
        var curLink = menu.find(".active");
        if( curId && curLink.attr("href") != curId ){
            curLink.removeClass("active");
            menu.find( "[href=" + curId + "]" ).addClass("active");
        }
    });

var isAnimating = false; // 标志位,用于检查是否正在执行滚动动画
$("#menu .link").click(function(e) {
    e.preventDefault(); // 阻止默认链接行为

    if (isAnimating) return; // 如果正在执行动画,不处理点击事件

    // 禁用点击事件
    isAnimating = true;

    // 移除所有链接的 "active" 类
    $("#menu .link").removeClass("active");

    // 获取目标锚点的 ID
    var targetId = $(this).attr("href");

    // 获取目标锚点的位置,并考虑头部菜单的高度
    var targetPosition = $(targetId).offset().top;

    // 平滑滚动到目标锚点位置
    $("html, #content").animate({ scrollTop: targetPosition }, 50, function() {
        // 动画完成后重新启用点击事件
        isAnimating = false;
    });

    // 添加 "active" 类到当前点击的链接
    $(this).addClass("active");
});


});

</script>
3.post.php加代码
usr/themes/xxx/post.php其中xxx为你的模板名称,
如:default,joe,jasmine
//重点1:给markdown-body加上id:content
<div id="content" class="markdown-body dark:!bg-[#161829] dark:!bg-[#0d1117] !text-neutral-900 dark:!text-gray-400" itemprop="articleBody">
      <?php echo handleContent($this->content);?>
</div>

//重点2:给右侧的siderbar加上joe_aside。
<div class="sidebar__right__inner flex flex-col px-5 gap-y-8">
    <aside class="joe_aside">
         <section class="toc">
              <?php if ($this->is('post')) getCatalog(); ?>
          </section>
    </aside>
</div>
4.joe.post.min.css加代码
usr/themes/xxx/assets/css/joe.post.min.css 其中xxx为你的模板名称,如:default,joe,jasmine
这个文件非joe主题是没有的,所以可以在目录里按这个名称创建,把以下代码全部拷入即可。
如果会前端的可以把样式改成自己喜欢的。
.joe_aside {
    /*position: sticky;*/
    top: 0;
    background-color: #fff;
    z-index: 100;
    .toc {
      position: sticky;
      top: 20px;
      width: 250px;
      background: var(--background);
      border-radius: var(--radius-wrap);
      box-shadow: var(--box-shadow);
      overflow: hidden;


      .title {
        margin-top: 44px;
        color: rgb(133, 144, 166);
        display: flex;
        width: 100%;
        height: 35px;
        border-radius: 4px;
        z-index: 1;
        /*box-shadow: rgba(18, 18, 18, 0.1) 0px 1px 3px;*/
        box-shadow: rgb(175 122 122 / 10%) 3px 3px 3px
      }

      .list {
        padding-top: 1px;
        /*padding-bottom: 10px;*/
        /* max-height: calc(100vh - 80px); */
        overflow: auto;

        .sub-list .item .link{
           /*margin-left: 20px;*/
           padding-left: 28px;

        }

        .link {
          display: block;
          padding: 11px 16px;
          border-left: 4px solid transparent;
          color: #fc9433;
          text-decoration: none;
          white-space: nowrap;
          overflow: hidden;
          text-overflow: ellipsis;
          border-left-color: #eee;

          &:hover {
            background-color: #666;
            /*color:#666;*/
          }

          &.active {
            border-left-color: #fc9433;

          }
        }

      }
    }
  }


@keyframes pulse {
    0% {
        box-shadow: 0 0 0 0 var(--theme);
    }
}
关于chatgpt给予的帮助
网上搜到的typecho用的文章目录生成方面的代码不够丰富。易于安装的样式功能太简单,样式功能好看强大的存在局限,无法通用。
于是,我跟chatgpt就这些代码的可行性和如何移植做了深入的讨论,反复迭代后有了以上的产出。不得不说chatgpt非常的强大!
